The idea to do this project came to me when I started playing around with the AirSpy and some transverters from Down East Microwave. I noticed that some have 10MHz reference in options and this really caught my eye. When using VHF/UHF especially SHF Transverters (Example 10Ghz) this really helps them from drifting and keeps them on frequency. So I wanted to know more about this topic and after months of research in my spare time, it lead to this project. You may also want to check out the presentation I did on this, you can get it from the downloads section.
So What exactly is a GPSDO? Basically a combination of a GPS receiver and a stable (Usually quartz or rubidium based) oscillator whose output is controlled/disciplined to agree with the signals broadcast by GPS satellites. Since GPS satellite time signals must be very accurate in order to provide positional accuracy for GPS in navigation, this makes a great known reference source. These signals are accurate to nanoseconds and provide a good reference for timing applications as well as a frequency standard, in this case the common 10MHz standard, also known as GPSDO for short. Added bonus: This unit also can serve as an NTP server for your PC. More on this later!
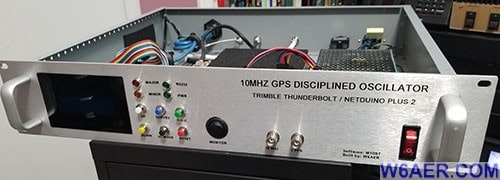
Right around this time I also switched to a FlexRadio (Should have done this sooner) and this also has the option for an internal or external 10MHz reference in. Other ham radios, for example many from Electraft have the 10MHz in option as well. Building this became a priority. Above and Below is the end result (Front and Back) and I will try and go over exactly how I built this unit. Including parts list, where to obtain it, software needed (both for the board and the PC) and so on.

The heart of the unit is the Trimble Thunderbolt GPSDO unit. These can be purchased on eBay as well as some other places which may have surplus units available. Just do a search online. Here is the general layout of the inside to start with.
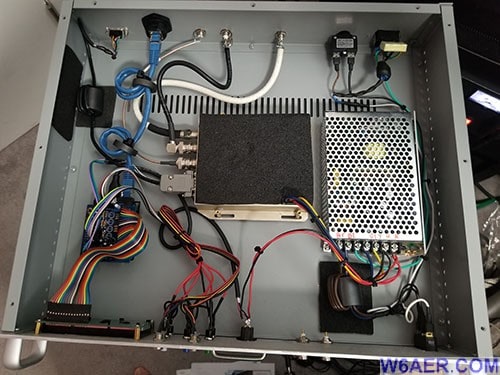
Here is the general parts list for the project:
- Enclosure - Your choice, metal is best to keep RF out
- Trimble Thuderbolt GPSDO unit
- Power Supply (see below for details)
- Netduino N2 Plus and a microSD card (2gb)
- M1DST Header Board
- LCD Display 4x20 with Cover (optional)
- Ribbon cable for inter connections
- Board spacers for mounting
- BNC connectors
- AC power plug and filter system if desired
- Various switches and LEDs to your liking
- Max232 chip & minor components for header board
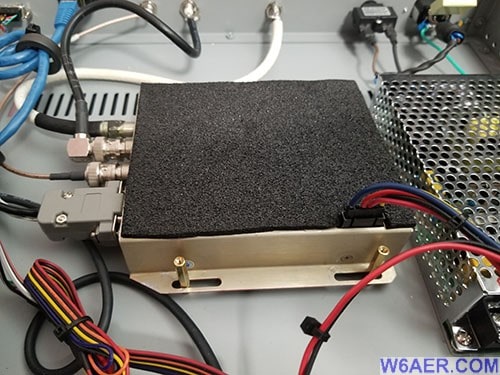
Close-up of the unit. I used some acoustic foam to assist with the heat loss on the unit, some people use Styrofoam, but this was easier in my case. This is an oven-controlled unit and heats up to maintain a regular temperature of the oscillator. Inputs are: DB9 Serial for monitoring, F plug for GPS in, 2 BNC for 10MHz out and pulse or 1PPS out, power in. More about this in a second.
This unit needs a -12, +12, +5 and ground/common input. The 12V is important and using these supplies they need to be checked as I did get one that put out 24V across the +12 and ground. Should be 12V of course. Double check this so you don't fry anything.
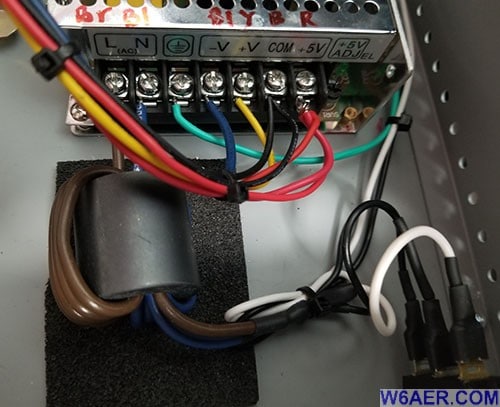
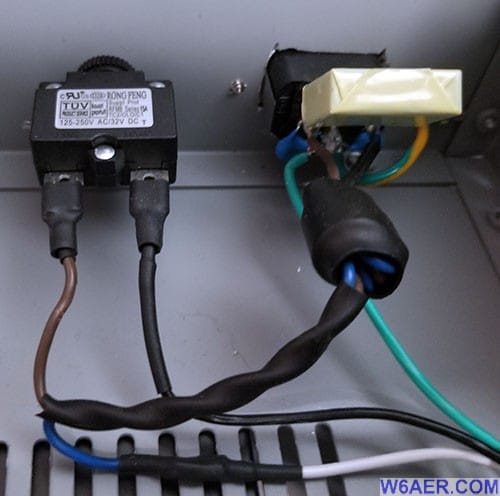
To feed the AC to the power supply (Brown and Blue above) I used a ferrite I salvaged from a power supply. This is optional but helps keep the output signal cleaner.
Below you see the circuit breaker and the filtered AC plug connected,. These were salvaged from an old PC power supply. Yes, I love reusing old parts if they still work and found some real gems over the years.
This build uses a Netdrino with the M1DST header as pictured below
- The M1DST header is located on the top
- Serial In from GPSDO
- Ribbon cable going to the LCD Display
- Wires to front buttons and to LEDs
- 5V power in (12v is not needed for Netdrino)
- Uses Max232 chip for serial data translation
- Hardware & PC Board designed by M1DST - Big Thanks!
The serial cable output can be connected to a computer running Lady Heather Software by KE5FX or the Trimble Monitor. The Printed Circuit Board is you wish to purchase one from M1DST is located here.
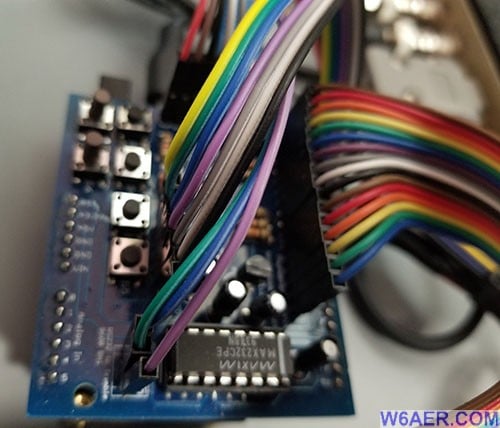
The Netduino has an Ethernet jack, allows me to run a super accurate NTP (time) server on my LAN to use by my PCs, etc. thanks to, yet once again, code from James M1DST. be sure to set to Static IP on the LAN.
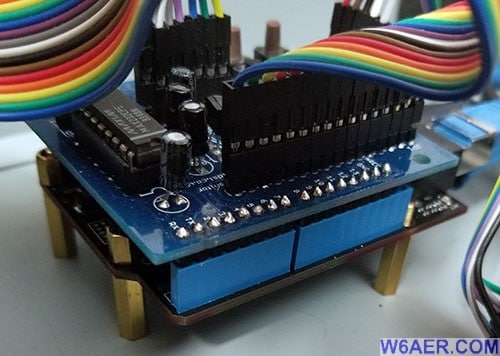
The Netduino N2 Plus specifications are as follows:
- Cortex-M4 @ 168MHz
- 384 KB Code Flash Storage
- 100 KB RAM
- 10 Mbps Ethernet (Makes the NTP server possible)
- Micro SD Slot (up to 2GB)
There are other options but I choose this one, see the Wilderness Labs website for details.
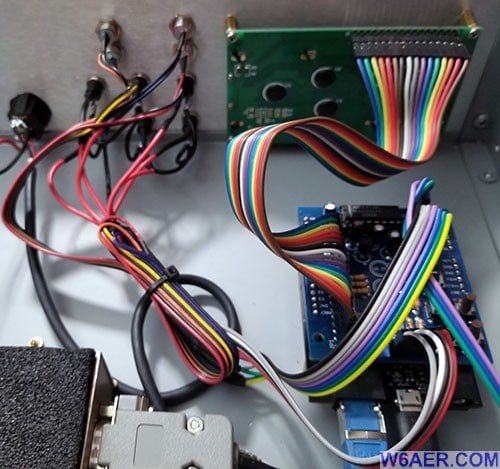
A slightly different view angle of the above photo to make it easier to follow.
- LEDs and buttons are wired to Netduino Plus 2
- Power switch to Netduino was salvaged from a broken hair dryer
- Ribbon cable to 8x20 LCD
- Wires to front buttons for menu control
- Ribbon cables are from a Raspberry PI Kit Leftover
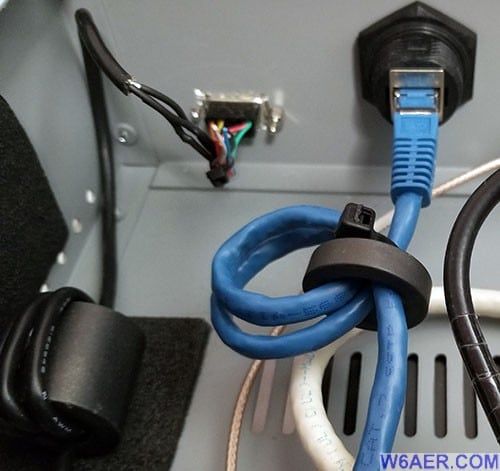
Here is the rear connector view to the DB9 (serial) port and the Ethernet cable which is connected via a junction connector normally used to connect WiFi connections outside. Easy to install just drill a hole and tighten it. I love these! So this is pretty much it for the hardware.
Now that the hardware is covered, you still need one thing.
Here is where you get the software thanks once again to M1DST: www.m1dst.co.uk/category/projects/trimble-thunderbolt-monitor The software is located at GitHub: github.com/m1dst/Trimble-Thunderbolt-Monitor
James, M1DST was already nice enough to share his code with the world and it was proven to work with this unit. It was written in C# (C Sharp) and he has been making adjustments to it periodically. In fact as of mid 2018, he has updated it and added features twice.
Once you get the software downloaded, follow the instructions on the Wilderness Labs website (or do a google search) as to how to load it on the unit which will store it on the SD card. If you have played with similar devices before, you will find this rather easy. You will need to download some software from Wilderness Labs.
Basically you will need:
- .NET Micro Framework (.NETMF) v4.3.2 - QFE2 SDK
- NETMF Plugin for Visual Studio Visual Studio 2015
- Netduino SDK
Please look for more info about this on their site.
Once this is done, you are basically done. Just start up the unit!
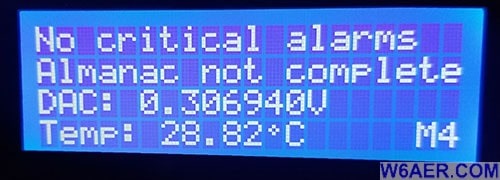
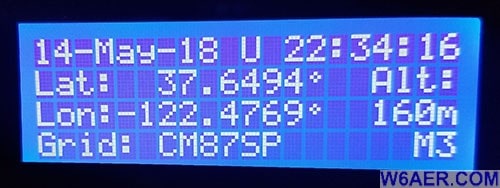
Here are examples of the display once you got it up and running:
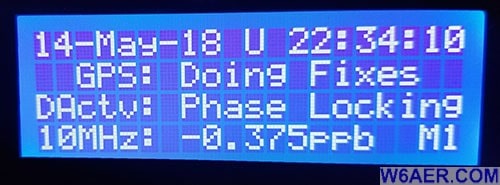
The Buttons select view up/down, select, reset and so on. I used color coded buttons in addition to labels so I can operate it even more easily but frankly this is a very simple to use unit if you are at all familiar with technology.
- Time is UTC but there is code to adjust this if needed
- Shows Grid which is nice for hams
- Latitude / Longitude and Altitude in Meters (software from UK)
- Temperature reading is from Oscillator (In Celsius)
- The M# in the corner refers to the Menu screen you are viewing.
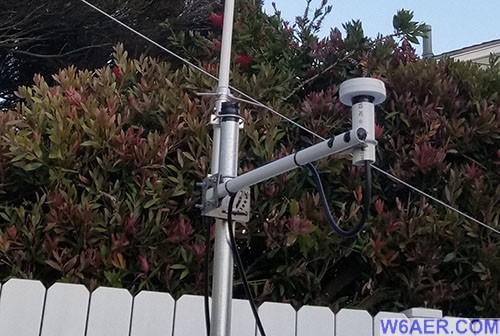
The GPS I originally used was a little under-powered and indoor. This was the button type that Trimble sells. I opted for an external GPS (Below) this is a unit from a company called ACE and it has about 30db gain. One thing to be aware of is that this unit takes a 5V not the 3.3V GPS units. Play it safe as it will damage electronics if you mismatch this.
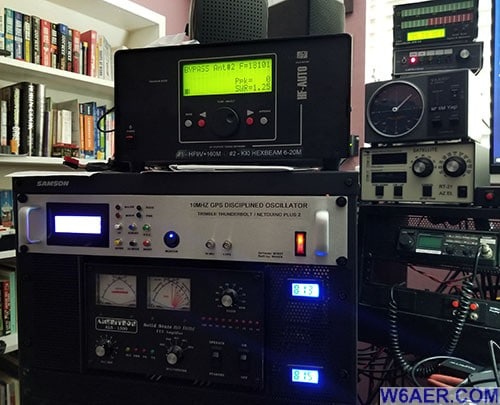
Here is the finished product installed and running. The display can be powered off as well as the Netduino without turning off the GPS and the 10MHz source. This is accomplished by using a separate AC switch (right side) and DC switch (center round switch with blue light). Hard to see the LCD in the photo I generally keep it on the main screen.
I am using a Down East Microwave 10MHz 4-way divider for providing the output to multiple devices.
Additional Information & Links can be found here:
- M1DST Software and links to other resources I had mentioned
- Lady Heather Software by KE5FX
- Wilderness Labs offers the Netduino Products
- GitHub Software location
I really hope you found this not only informational but also useful. I would love to hear your feedback as I am sure would James, M1DST. 73 for now!
If you find something incorrect and/or have an update, I would really appreciate if you could let me know by contacting me. I like to keep things as up-to-date as possible. Thank you! - Lucas / W6AER


