After using the Butternut (Now DX Engineering) HF9V with the 160m add-on for MANY years and even more modifications, rebuilds and storm damage, I have decided to give the SteppIR Mark iV with the 80M coil a try. As of me writing this, I am so glad I made the jump. Sensation results and great antenna!
This is not intended to be a replacement for the manual, nor will it go into detail just wanted to share some of my feedback, pictures, tips and tricks.

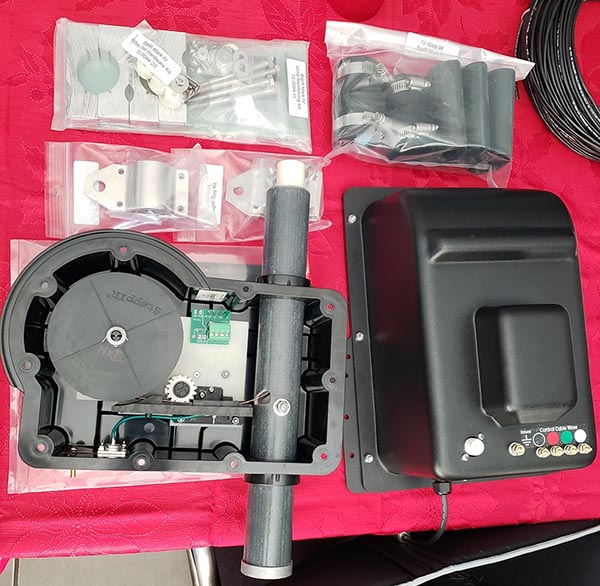
Above are some of the parts you will be getting, I would HIGHLY recommend getting a heat gun! You will thnk me, hair drier will no do...This is for the many heat shrink tubing components you are going to have to use to make it watertig
On the right is the 80m add-on unit. Two things to not on this:
- It also switches 60m which is awesome!
- You need to get the plastic (or fiberglass, forgot which) high wind kit which goes between the main motorized unit and the add-on unit, not the metal one if you want to operate legal limit or more then 100W. Not sure if they now switched over to the non-conductive material for all orders but I have tested it running 1500W on 80m and no issues or arching.
I would read the manual...TWICE and maybe even look at youtube videos. Saved me a lot of time.
The packs on the left come with the unit, USE THEM even if you think it is optional. You will thank me in a few years.
On the right are some 9pin and 25pin adapters which are very handy in ham radio as well as here to connect to the controller. I got exposed to these in my IT career.

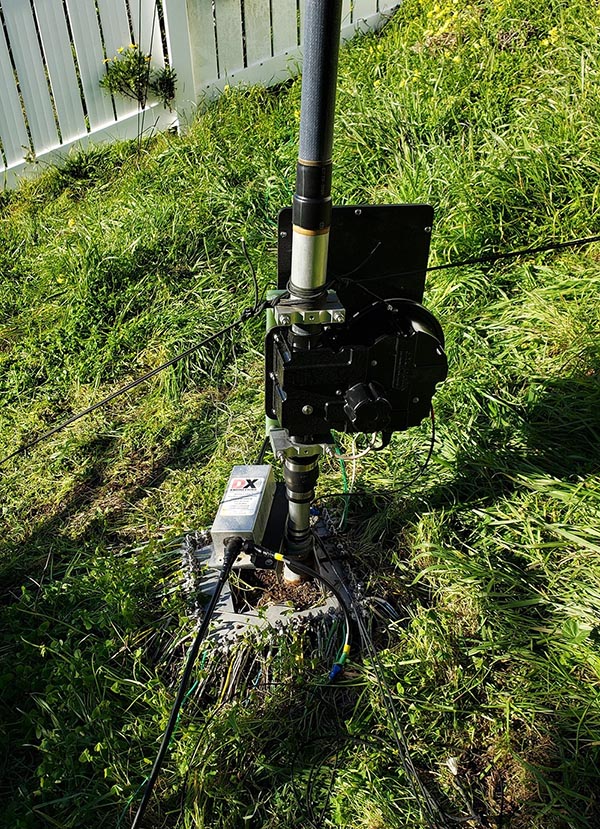
Here is the final unit, I reused my DX engineering Balun and the Dx engineering radial plate and radial wires from the butternut HF9V. So the transition was very easy!
Here are a few different views of the installation of the SteppIR Vertical.

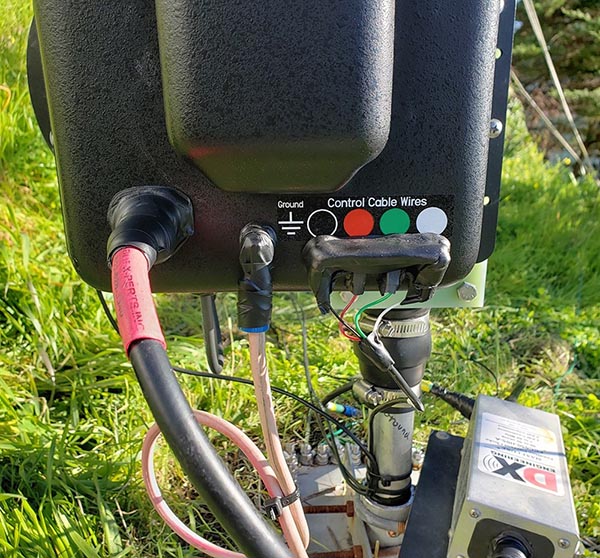
I used coax seal and electrical tape to seal both the coax and any exposed electrical connections. I was told that I do not need to worry about the control cables as they are spaced far apart but again...I am paranoid. I built a little "roof" to keep some o the water away.
Keep in mind you will need TWO sets of 4 conductor control cables if you get the 80m add-on since it also needs to be remotely controlled.

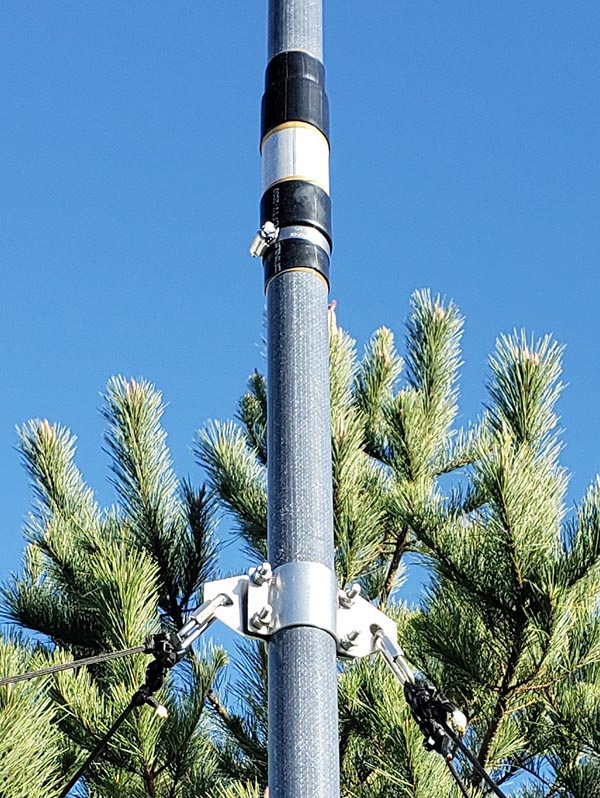
I included this photo to show two things. How the weathertight heat shring tubing looks when installed as well as how the guy wires are attached. I used two sets of these (ordered one extra) since I live in a windy area.
Overall, with good preparation and reading the manual carefully, the installation is actually very simple and does not take long. It can be done in one afternoon. I hope this helps out someone and as a side note, and I am not getting paid for this, but I do highly recommend this antenna!
If you find something incorrect, have an update, or if there is something you would like to see added to the site, drop me a line here. I like to keep things as up-to-date and as accurate as possible. Thank you! - Lucas / W6AER


