
As a very happy costumer of FlexRadio, I own the 6600M as well as many other options from the company, including the Maestro and so on. Shortly after purchase, the company reached out to some early users of this model and offered to send a heatsink upgrade kit. This was due to some issues noticed by some heavy users who have their unit on 24/7. I would fall into this category as my radio is practically never off...So I asked for the free kit.
The kit arrived, at no charge and within days! It included all the tools as well as 2 new heatsinks (The 6400/6400M apparently only needs one but the 6600/6600M requires two) as well as some additional parts and printed instructions. So I proceeded to read the instructions on how to perform the upgrade, as well as watching the video posted on their YouTube site and of course reading up on this at my favorite FlexRadio forum at: community.flexradio.com
Flex Radio Systems has a![]() YouTube Channel Dedicated to help people get started with their products, they have also posted a step by step video about this fix.
YouTube Channel Dedicated to help people get started with their products, they have also posted a step by step video about this fix.
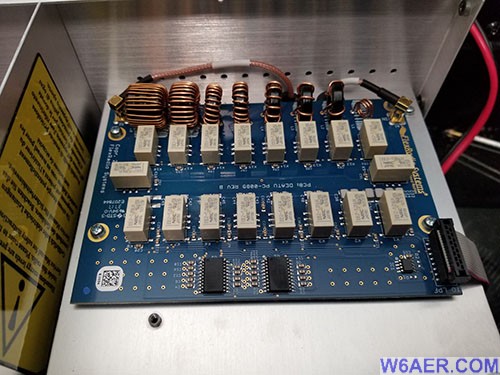
Here is how it looked once I got the unit opened up:

Sure enough, I was one of the users who had loose or already fallen heatsinks (See above). You can clearly see one slipping off and the other actually already fell on the circuit board. I would have never known!
Being an early purchaser is always a risk, but at least it was noticed by FlexRadio and addressed super quickly. Apparently Icom had similar issues around this time as well so that makes me feel better. And let's not even get me started with all the issues over the years with some other brands...but back to the topic.
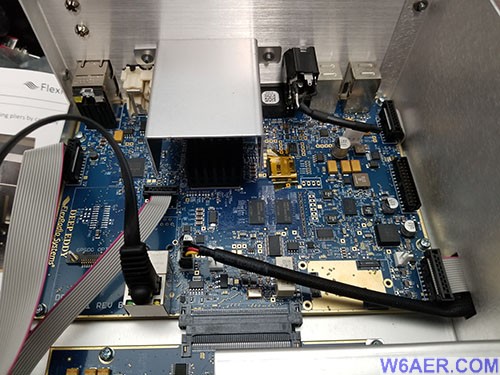
While looking around inside, I have to say I am very impressed with the overall design, layout and how modular it is. Looks like some real thought went into this unit!

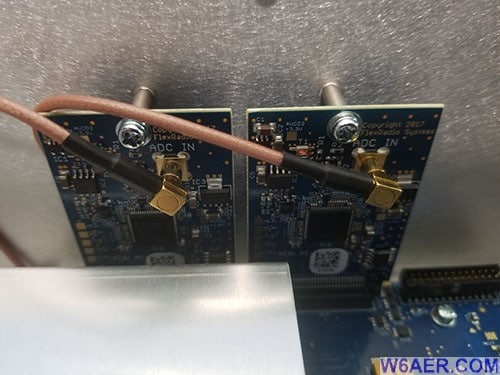
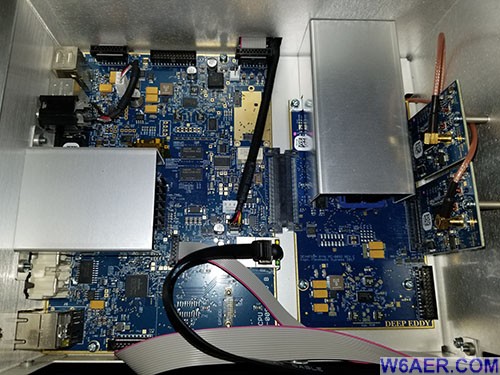
This is the finished install front view (Above). Please note that the, now much larger, heatsinks sit on the back of the unit. Also note the sockets these removable boards sit in. Looks like there are additional connectors on the board, perhaps future expansion? Adding the new heatsinks was as simple as peeling off the tape from the heatsink and attaching it.
Below are some photos taken at different angles in order to illustrate this "new look". I did run the unit open for a few hours (not sure if a good idea but...) and I could store beer in it. No problems, runs nice and cool!


The whole "surgery" took about 30-40 minutes and frankly the longest part were removing the screws and reading the instructions. I do have to complement Flex about their quick response and super quick shipment of heatsink kits. I have nothing but positive things to say about FlexRadio costumer service!
So...Since I had the unit open I decided to take some more photos since I see constant questions and requests on the forums as well as the internet in general asking what the new 6000 series units look like on the inside. Since I had to open it anyway, wonder no more! I did not have to worry about voiding the warranty anymore.
NOTE: You can slide the pictures over for more, the open up if you click them.

I really hope this helps someone and likely all the early units with this issue will be or have been addressed already. Regardless, I figured this would be nice to have for historical reasons. It would be a waste of all the cool photos of the inside if I did no post them. 73 for now!
If you find something incorrect, have an update, or if there is something you would like to see added to the site, drop me a line here. I like to keep things as up-to-date and as accurate as possible. Thank you! - Lucas / W6AER

