
I have owned many Astron Power Supplies over the years and I am very happy with their products for the most part. One I used to use in my shack as a reliable 13.8V power supply is the 70A Astron RS-70M. This is a good linear power supply (Vs. Switching) and can take a good beating. I was running my 6m and 2m amps off of it as well as my main unit (Yaesu at the time before going to Flex Radio) and the amp needle hardly went past half.
Two things I did not like about the unit is that the lights were not back lit and that it ran a little hot for my taste. As it turns out, both can be fixed....and off we go!
Here is the actual beast of a unit the Astron RS-70M 70amp Ham Radio Power Supply

Let's address the lights first:
The Meters come in 3 flavors: Non-lit, traditional back light (yellow-ish) and the LED lights (blue-ish). I decided to get the LED back lit meters and I ordered these directly from Astron. They arrived very quickly and it was an easy replacement. BUT, there was an "issue" later on with the LED Lights and I have recommended fix for it so please read on carefully.

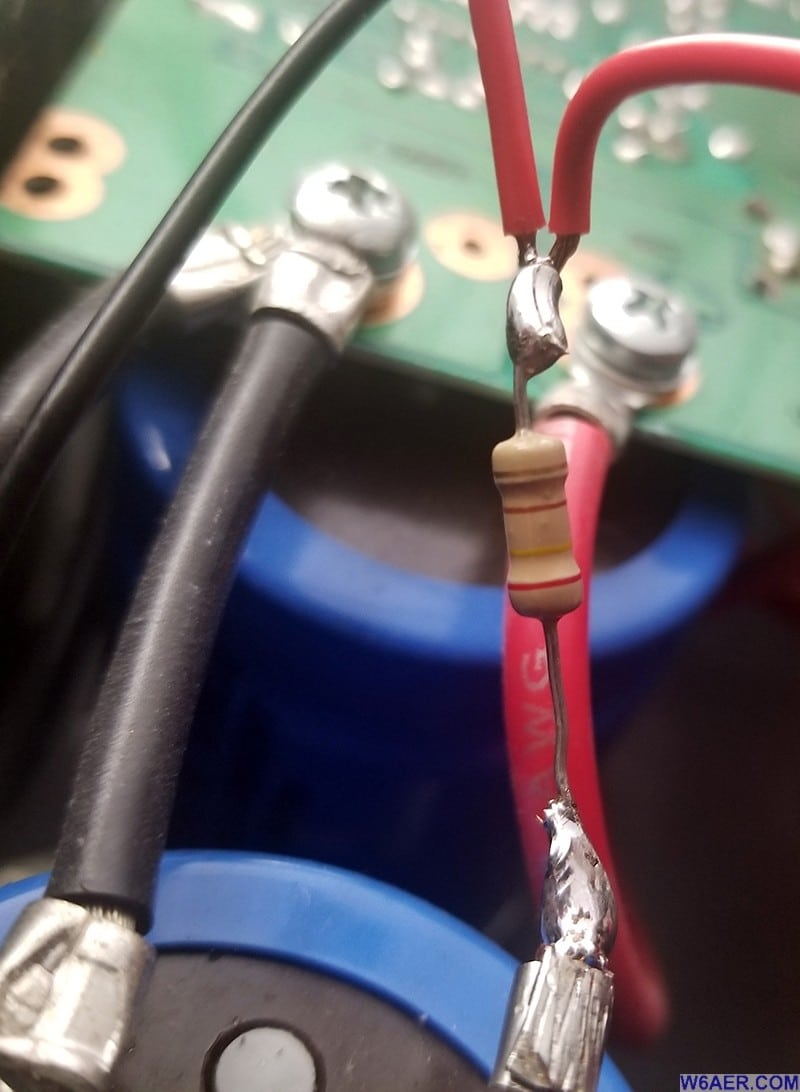
The Installation of the resistor is rather important for obvious reasons. Giving the LED assembly nearly 14V is asking for trouble. This is how I choose to install the 1/2W 240 ohm resistor.
Below you see how the unit looks near the meters. There are two, one for Volts and one for Amps. BOTH need to be removed and both are only held in place by two screws. Easy to remove, not so easy to put back if you have larger hands like me. You will need to feed the power as shown Below. Be sure NOT to mess with the variable resistor (Blue box) as this was used to calibrate the meter, unless of course you are going to be re-calibrating it.
Follow the instructions provided by Astron for assembling and installing the LED Assembly. Very straight forward but do set aside a good hour for both upgrades.


For the second issue, let's address the heat:
This heat which appears to be generated by these units, I asked around about and apparently this is just how they are. I guess it is the nature of the beast. Even with a light load, while they can take a lot they seem to heat up for folks. As one can see the main transformer alone is enough so stop a bus from rolling away! Right photo shows the overall orientation of the components in questions, right side, rear is the switch I installed. Please pay attention to the power rating on the switch you are going to use, 120v not 12v. In this case the zero matters!
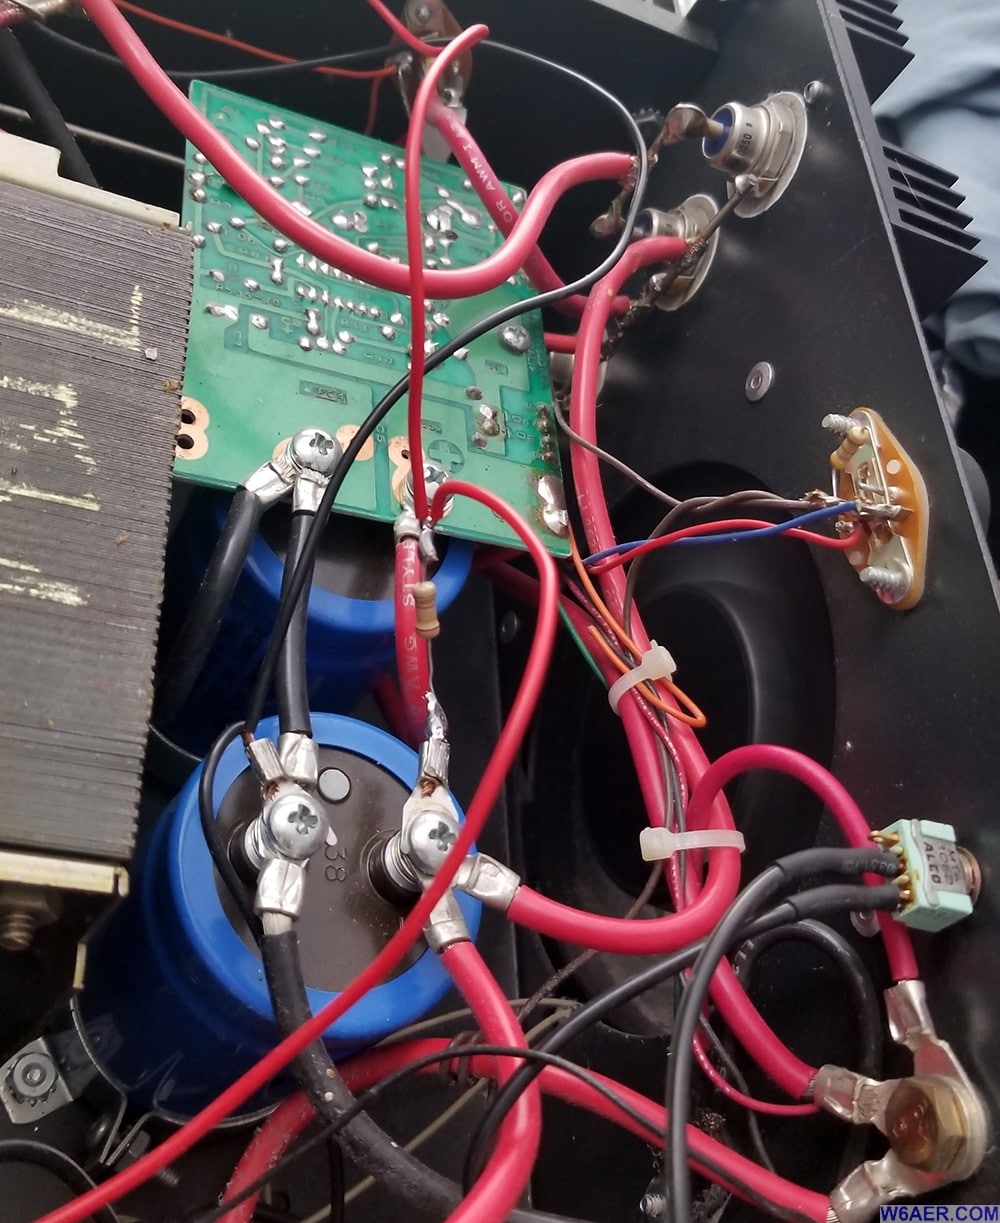
After I installed the bypass switch to have the fan on all the time but be able to turn it off easily I was quite pleased. The location for it turned out perfectly. There is a connector used by this power supply in case you want to stack two 70amp supplies. Why anyone needs 140amps is beyond me, and I sure don't so I removed the connector and installed a very simple switch which basically "shorts" the thermistor (pictured below, temperature sensing transistor basically) making the unit think it is over heating. This will still allow the thermistor to work as before and trip when it hits 120 degrees (going from memory, might be 140). The unit ran like a fridge after this install. Fan noise, yes. Headphones = Problem solved. If you are located far from the supply that is another solution if you are concerned about noise. I am personally not bothered by a little fan noise.

Above is the closeup of the temperature sensor, thermistor (Thermal Transistor). And below is how it looked once I got the unit all upgraded:

I hoped this inspired some of you to service or upgrade your power supply. If you have comments or questions please let me know. I would also love if you shared any other modifications you may have done to this unit.

I really hope this helps someone who wants to make these modifications to their Astron Power supply. 73 for now!
If you find something incorrect, have an update, or if there is something you would like to see added to the site, drop me a line here. I like to keep things as up-to-date and as accurate as possible. Thank you! - Lucas / W6AER