
I got to meet John, K6MM at an NCDXC meeting and got word about an antenna he designed which was published at one time in QRZ. I already had 160m capability but wanted to add to it and so the story begins.
You can find John's plans here on his website.
Here is by build and experience with it as well as final results.

 I purchases a rather large and heavy spool of 500ft wire, dark green (solid conductor, copper) so I could blend into nature and the hillside. It only does the trick in the winter, summers when dry it really sticks out as I found out within a year. The link above is to amazon, they seem to have the best deal, beat my local home depot by $15.
The leftover wire was used for radials with some additional wire I purchased from the now-defunct Weirdstuff store. What a shame, I sure miss that place! I have since replaced this with a larger and somewhat better (also more expensive) DX Engineering version to accommodate more radials.
 The PVC pipes (3 sizes, see Johns article for details) and brass bars were all purchased at Home Depot, the radial plate (now replaced with a larger DX Engineering one) from eBay. I soon realized as I did with my Butternut HF9V (with the 160m add-on) that the more radials the better, to a point at least. Also, I found the metal used in the DX Engineering product held up better in the elements. The one on my HF9V at the time I am writing this is now 5+ years old and looks like I just got it! As a side note the bolts were not as good quality either as the one from DX Engineering and the plate was tight that it was impossible to bolt all radials on the same side, I alternated to solve the issue in the meantime until I replaced it altogether. You do NOT need a radial plate, but I feel it makes life easier and cleaner.

 The post was a standard 2" pipe with 2 60lbs bags of fence post mix. I opted not to use the method described by John, K6MM not because it is bad but we have much higher wind speeds here there where he is not to mention I am on a hillside and the antenna is on a slope.
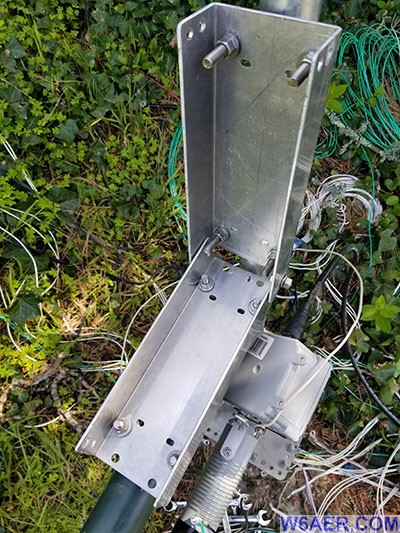
For easy maintenance I also added the Vertical antenna tilt as seen here. This is a Hy-Gain Product now sold and owned by MFJ. Except for the bolts it actually holds up pretty well. I have been known to replace the "parts" with higher quality stainless steele to reduce maintanace longterm.
Once I wrapped the PVC with about 1/2-3/4" spacing, I secured it with gorilla tape in places to hold it in place. I also changed the carriage bolts which were metal with nylon screws I got a hold of online. This eliminated ALL metal that was not part of the antenna from the structure. I also put some coax seal on the bolt on the very top of the vertical where the capacitance cap connects.
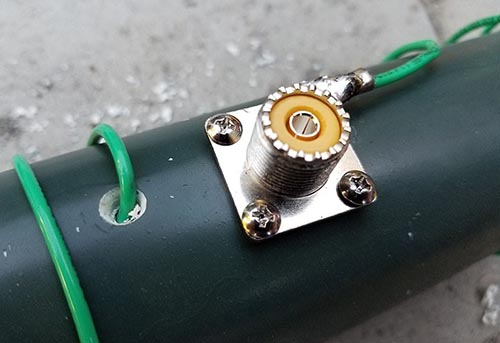 The next step was a learning experience, I originally intended to install an So-239 (UHF) plug to make it a clean install and look professional. I did not feel great about the way I did it, so I decided after doing some SWR measurements to use a balon and run the wires straight to the wing nuts on the balun. You will see photos of this below. Is it needed? Frankly, not sure. Can it hurt? No.

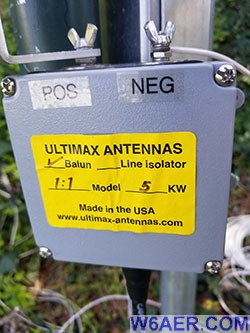 The Balun I used is an Ultimax Antennas 1:1 with a 5KW rating so shuld be no issues there!
Here is what I ended up doing at the base of the antenna. I now measures 1:1.1 at 1.840 (FT Frequency) and I can run legal limit into it on CW with the tuner which is really not needed but I feel better about it if I am too lazy to adjust the spacer (more on this below).
Since I get a lot of questions about this, I took two close up photos. Note the added DX Engineering vertical antenna match coil. Note: I realize I am not using it as intended. I used it for adjusting the length and liked it so much, I left it with FT8 and CW markings so I can move it during contests, etc. so no need for a tuner.
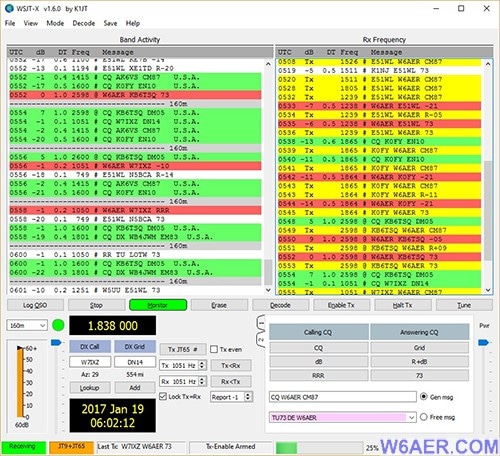 And lastly, here is the final product below and what it can do below. I am overall very happy with the performance. I rightaway fired up WSJT-X on 160m and within minutes the first station I worked was E51WL. (See image). I did a compare to my AOR loop which was about the same on receive but it did outperform by a hair teh HF9V with the 160m Add-on.
The Antenna actually works very well on other bands with a tuner if needed but I just tested this out of curiosity. One interesting thing I found was that when tuned to the 160m FT8 frequency, it actually tuned up pretty well on 6m! What a surprise that was.
In Conclusion: Very nice design John! Thank you for sharing this with the rest of the ham community!

And lastly here is the finished product! The trees may work against it but I still had very good results with it and it will be part of my antenna farm for some time to come.
UPDATE: I have made some modifications to this antenna, please check here to see what I have experimented with.
If you find something incorrect, have an update, or if there is something you would like to see added to the site, drop me a line here. I like to keep things as up-to-date and as accurate as possible. Thank you! - Lucas / W6AER

