If you have been a ham for a while, likely you have encountered Anderson PowerPole Connectors. If not....you will! Love them or hate them, they are part of ham radio. I personally do like them, although I do realize that many folks do not know how to:
- Build them properly
- Secure them properly
I think this is the reason some hams dislike them, here I will cover how to deal with the above. What you need and what MANY forget to use!
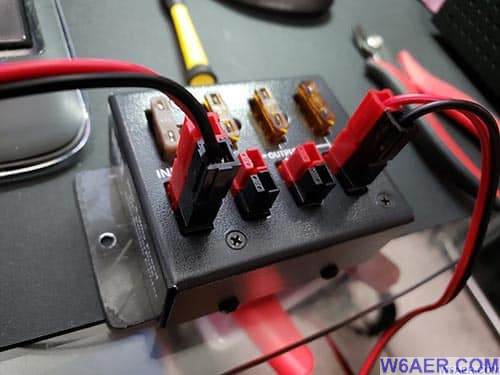
Above is a typical (but smaller) PowerPole Distribution unit. These are available from West Mountain Radio as well as MFJ and come in many sizes. I gave 4 in various sizes in my shack including the Rugrunner 4005i which can be remotely controlled.
PowerPole Casing
PowerPole Conductors
Let's start with the obvious...I think most folks know about these parts above, although I have seen them assembled reversed as well as the metal conductors inserted upside down.
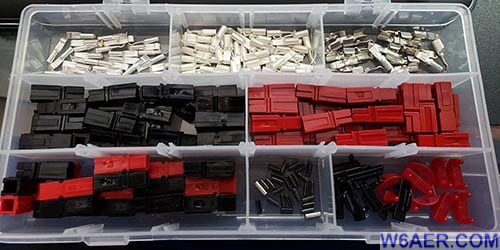
Next time you are at a hamfest or visiting your local ham radio store if you have one, it might be worth investing in a kit like the one above. Has everything you need to get going. You can also purchase them here on Amazon using this link and help support this site.
Pins
Couplers
And this kit includes the above parts which many if not most hams disregard. The pins are used to stop the plastic pieces from sliding and the couplers are used to securely join as to prevent an accidental disconnect. Which, by the way, is the biggest complaint I hear. Not if you use the above parts!
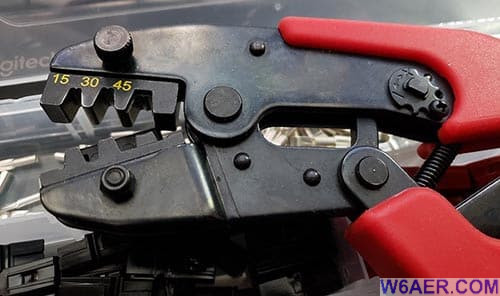
You will need a crimper, like the one above. Here is a link to a good one on Amazon you can buy now. I do not recommend using standard pliers or I have even heard of a guy using a hammer (not kidding) to make these. Save your fingers and strength!
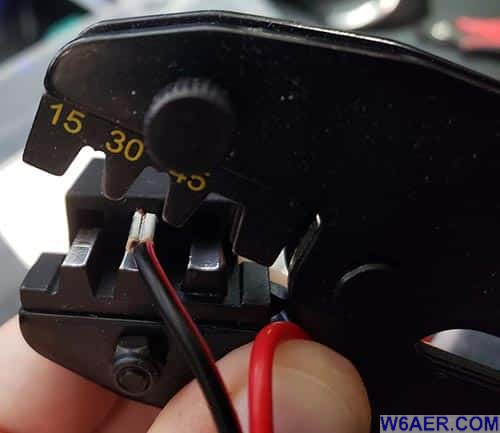
The crimp tool will have different gauge slots. Use the correct one, but frankly if, in doubt usually, 30 will do the job for MOST things. The front portion of the connector (the curved part) actually inserts into the compartment in the tool to secure it. Illustrated above. Apply enough pressure to have it look as above. The cable needs to be stripped enough to ver the length of the cable to be crimped.
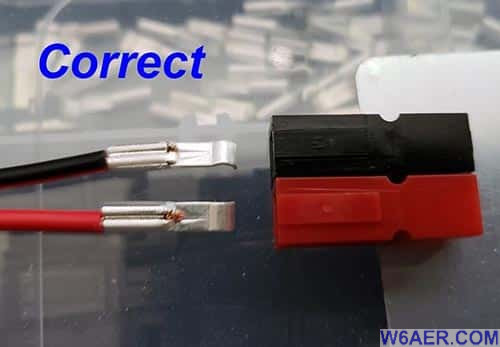
Note the position of the parts to be inserted as well as the plastic assembly! If yours looks like this, you are good. Pay special attention to the beveled parts of the plastic and the orientation as well as the direction. Should look EXACTLY as above.
You will then insert one by one until you hear a small click. The cable then should be secured and ready.
I hope you find this helpful!
If you find something incorrect, have an update, or if there is something you would like to see added to the site, drop me a line here. I like to keep things as up-to-date and as accurate as possible. Thank you! - Lucas / W6AER


