
Here you can see Earth over 24 Hours as seen from the GOES 17 Satellite. I compiled this to make it more interesting. If you want to see the REAL full version of this at full resolution, please CLICK HERE. If you want to see GOES 16 Satellite image with Enhanced weather Animation at full resolution, CLICK HERE. These were both downloaded (as individual images) using my Raspberry Pi GOES receiver early 2021.
If you are on the East Coast you would be trying to get GOES 16, so just adjust per your location, your tilt and dish angles will be different of course as well as the rotation to adjust for polarization based on your address. Dishpointer.com is a helpful site for it. There is also info in the original install links below.
I have built this project a total of three times now with various hardware and adjustments to the software. I wanted to share my findings here with everyone, what works, what does not work and trouble I ran into. This project is based on the writeups found at:
The goestools on gitbub.com are located here: https://github.com/pietern/goestools
Therefore you would be installing it using:
git clone https://github.com/pietern/goestools.git
For the actual installation guidelines please follow this:
https://gist.github.com/lxe/c1756ca659c3b78414149a3ea723eae2#file-goes16-rtlsdr-md
If you want to save yourself a TON of time, use this link to purchase the kit from Amazon. Includes all you need to get started on the "radio" end just add a Raspberry Pi, SD card and a bit of your time. Visit here to check it out:
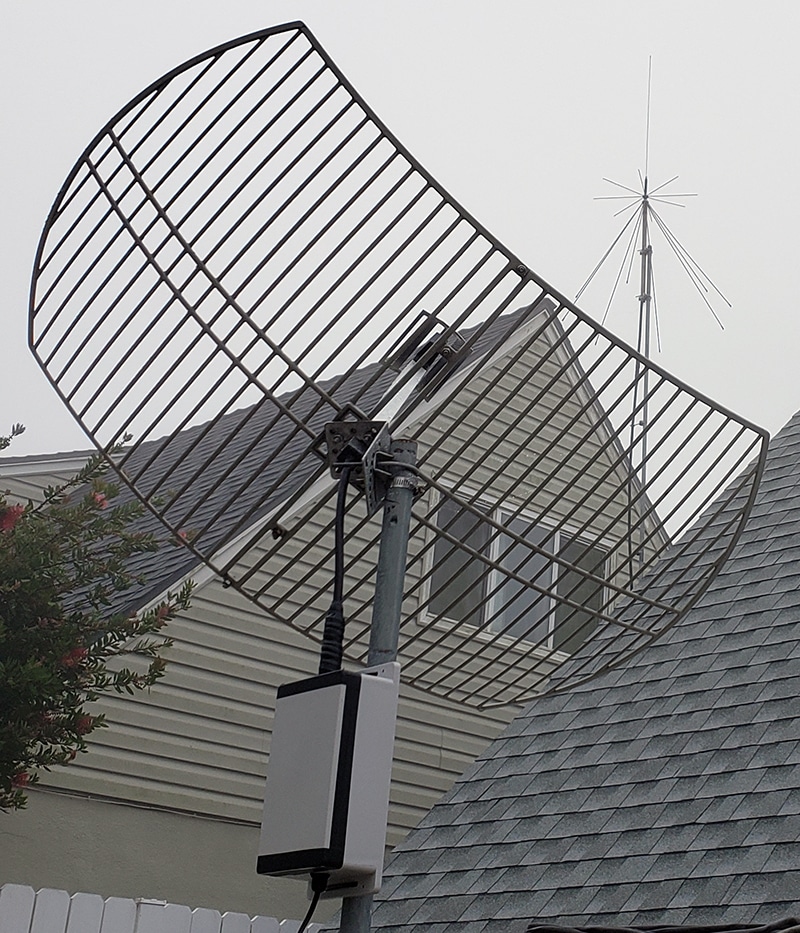
Here is my actual setup for GOES 17 reception at the W6AER QTH. This is a permanent install on my shed roof. The GOES Satellites are geostationary, meaning, they appear to be in a constant position in the sky as they move at the same speed as earth. Much like Satellite TV satellites such as DirecTV and so on. The box with the black lines below the dish contains the RPi as seen later on this page. Note short cables to avoid losses. Also not the position of the disk and the tilt as needed when trying to get GOES 17 from California.
It is always a good idea to update your Raspberry Pi before installing anything new. You can do this with the following:
sudo apt-get update
sudo apt-get upgrade
sudo reboot
Now you can proceed! While I think VNC built in tool and SSH are nice, personally I like to use remote desktop from my windows machine to access them. This is done by running:
sudo apt-get install xrdp
And there is literally nothing else to do on the RPi. On your PC, open the Remote Desktop Connection Application and enter the IP address of your Pi and follow the prompts for the username and password. It may give you a warning, depending on your windows this may look different but just proceed. All done!
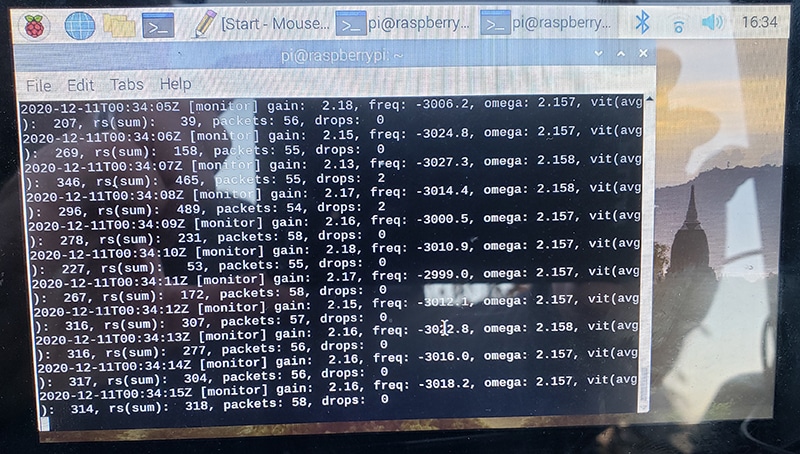
I used a small monitor connected directly to the Raspberry Pi when I was aligning my dish. I got it to be consistently below 500 (Per directions). The unit is now of course running headless. This is of course all to be done once you followed the procedures I provided in the links above.
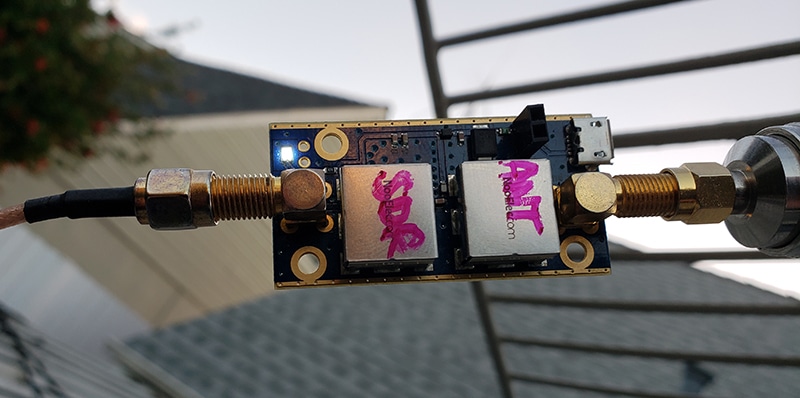
I have found it useful to label the Antenna Side and the SDR side of the LNA (aka Preamplifier) as they are rather easy to mix up. Also make sure you do NOT use both coax fed power and USB fed power at the same time. One or the other only. Light is always on when power is supplied to the LNA. This is also useful to diagnose breaks or defective connectors as these are likely with delicate SMA connectors.
Changes of the following in the goesrecv.conf config file did the magic. I played around with this and using the NESDR SMArTee XTR SDR and using the Nooelec SAWbird+ GOES Barebones - Premium SAW Filter & Cascaded Ultra-Low Noise LNA Module for NOAA (Links for both above) I had to use these settings for best results:
sample_rate = 2000000
gain = 35
bias_tee = true
Some recommend Gain at 30, seems mine works perfectly at 35 even 40. Not sure how much difference it really makes though. Got a great copy but seems a tiny bit better at times with the above settings.
I also found I had much better luck with using the proper dish antenna designed for the frequency range needed or close to it, then those deigned for 2.4GHz. While these are cheaper, might not be worth the headache unless you have one laying around already. Even then, I would just buy a new kit frankly unless you like constantly adjusting it, at least that was my experience.
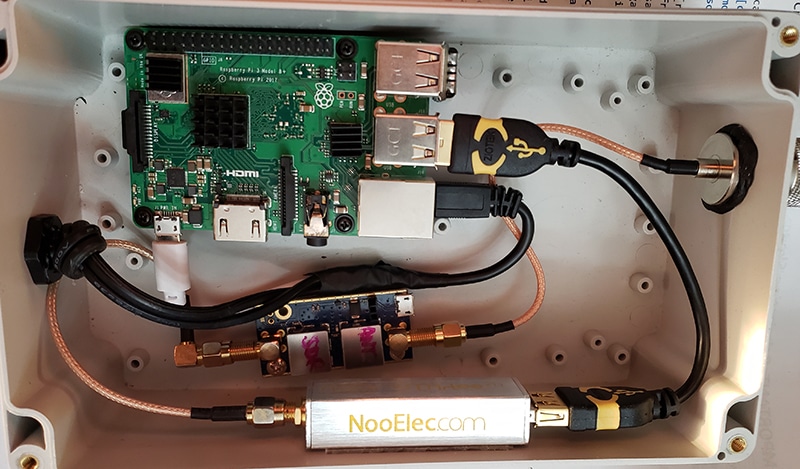
Here is what is inside the beige box under my antenna. Raspberry Pi, SDR DOngle, LNA and some wires as well as Power over Ethernet (aka POE) where I feed the Pi with a single RJ45 Cat 6 cable which connects it to the LAN as well as supply the 5V needed. Makes the unit easier to relocate and a lot less wires needed.
In addition to the top images loop (these get downloaded one by one, you are looking at 24 hours there) you will also be able to see some of these type of full disk images below. There are multiple channels and filters but these I think are some of the best samples to give you an idea. The 2 below are relayed from other satellites GOES 16 and Himawari 8 as well as M2.
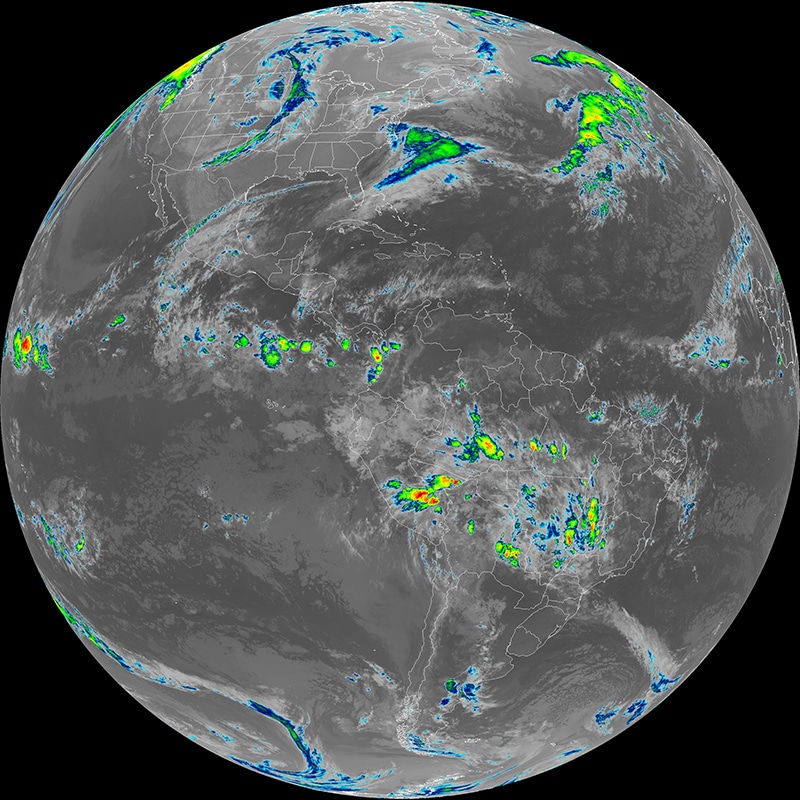
Above is the US East Coast as seen from GOES 16, this is the enhanced map to indicate rain. Looks like South America is getting heavy rain! If you want to see GOES 16 Satellite image with Enhanced weather Animation at full resolution, CLICK HERE.
If you want to see the REAL full version of the West Coast GOES 17 Satellite at full resolution, please CLICK HERE. These were both downloaded (as individual images) using my Raspberry Pi GOES receiver early 2021.
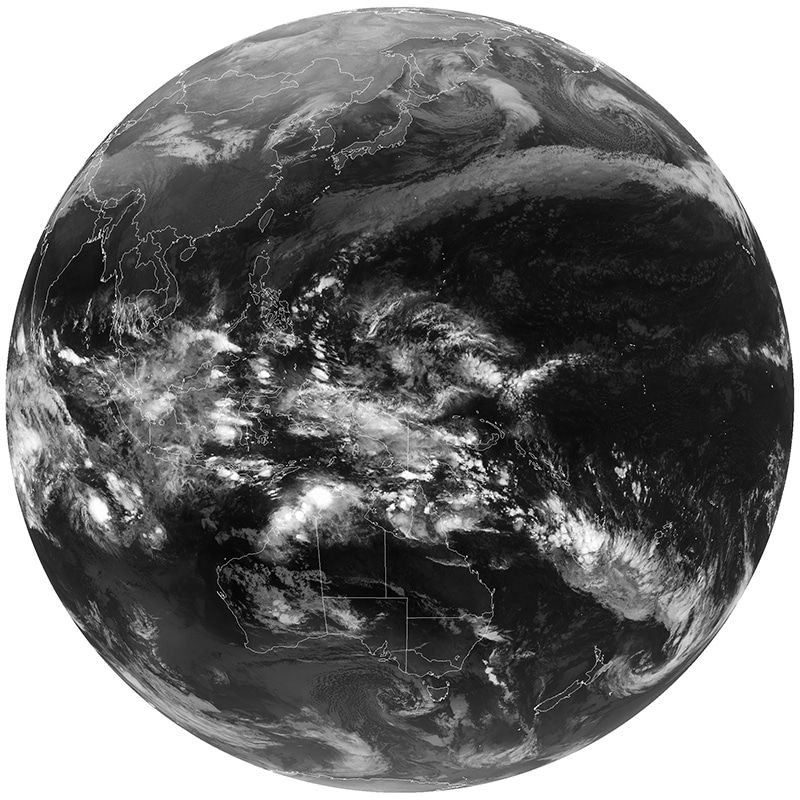
Here is a view from Himawari 8 looking at Asia and Australia. This came in Via GOES 17 early 2021 also as did the image above this one.
As a bonus, once you setup your receiver (In my case pointed at GOES 17 since I am in California) I also started receiving GOES 16 and Himawari 8 Images which are relayed from satellite to satellite to make them accessible for those not in range. Additionally there are also National Weather Service (NWS) reports which are saved in a folder. Here are some Examples of these: (They were also resized to fit as were the full disc images above)
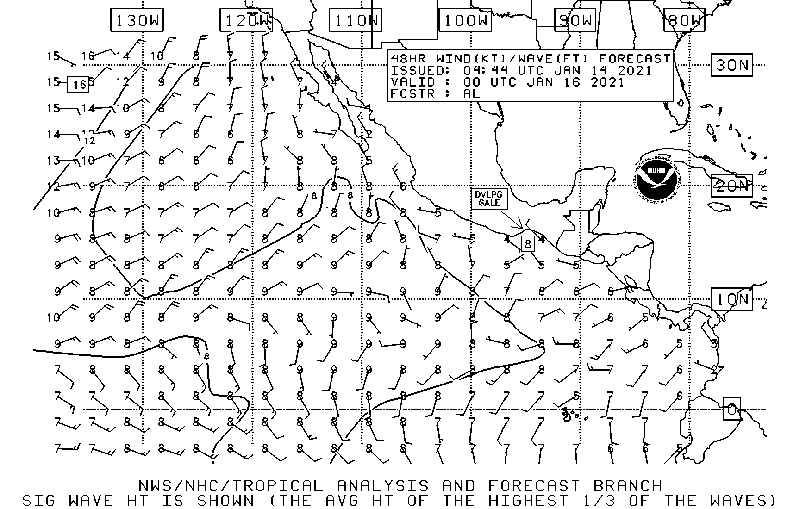
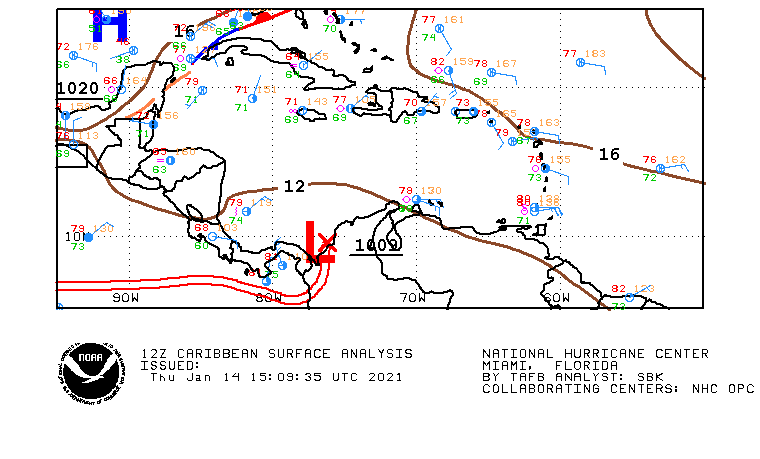
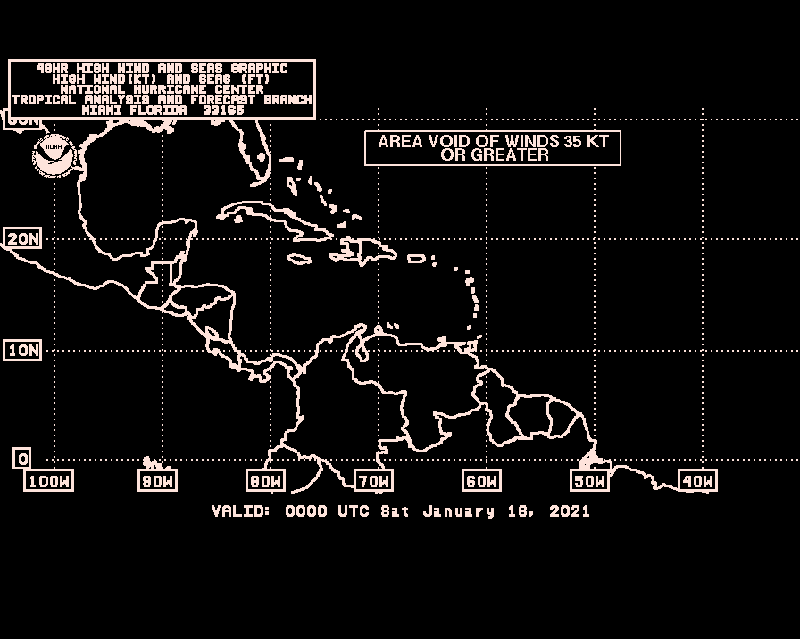
There is a LOT of data coming from the GOES satellites and it seems nearly non-stop. So you will need to either clear the card every few days or map it as I describe it below. Alternatively you can also attach an external drive or map it so it saves the downloads to a NAS or server folder, or even a cloud drive if you have one with a lot of storage.
If you would like to share a folder on your Raspberry Pi to be able to access it on your PC or Mac, you will need to install something called Samba. To add a Samba Server to your Raspberry Pi is pretty straight forward:
sudo apt-get install samba samba-common-bin
Click Y to allow it to install.
Next you either create the share or make note of the location you want to share in the next step. If you need to create a share:
mkdir /home/pi/shared
This can be named anything and location can be different as well, just make sure you remember it. Next edit the config file:
sudo nano /etc/samba/smb.conf
Add these lines at the BOTTOM of the file:
[share]
path = /home/pi/shared
writeable=Yes
create mask=0777
directory mask=0777
public=no
The name shared can be replace with the name you want to use. Defaults are fine for most. Use the arrow to navigate down, Control-X to exit and Y to save.
You can always go back to this file to make changes and to add other shares or change the share permissions.
For chmod (permissions) just remember that 4 stands for reading rights, 2 stands for write, 1 stands for execute, and 0 stands for denied or no access. You use a combination of these. Therefore 7 is the combination of permissions 4+2+1 so can read, write, and also can execute, 5 is 4+0+1 read, no write, but can execute. Therefore the above permission give FULL control.
Now create a user:
sudo smbpasswd -a pi
Follow the instructions to set password. Restart what is needed using the following so changes take:
sudo systemctl restart smbd
Next map the drive as you would normally on your PC or Mac, you should be able to navigate to your newly created share. You you do not know your IP address type:
hostname -I
This will give you an IP4 and an IP6 address. Likely starts with a 192.168.x.x or 10.x.x.x this is what you want. But you can also use the name of the Pi in many cases, this can be under preferences and Raspberry Pi configuration in the host name box.
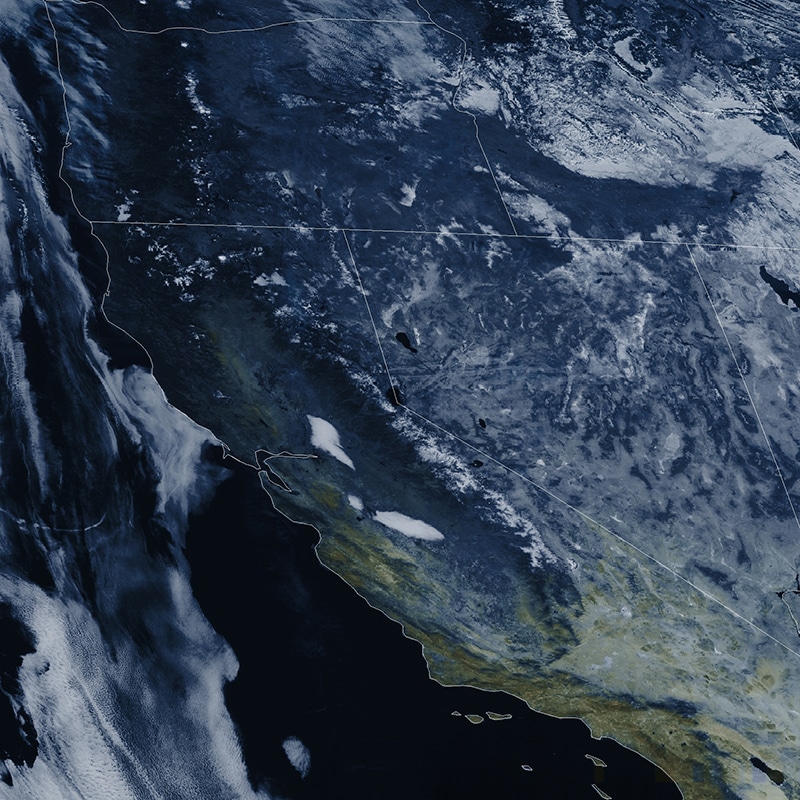
Lastly, here is an image of "home" also known as California. This also came in via GOES 17 early 2021 and was a relay from M2 Satellite.
Be sure to check out my guide to NOAA satellites using the Raspberry Pi and I also have an older guide on how to Receive NOAA satellites without using a Raspberry Pi, the traditional way.
In addition to this website of course, here are some other great places to find more information on the Raspberry Pi and related items:
- AdaFruit
- List of Ham Radio Applications for the RaspberryPi
- MagPi Magazine with a tone of great information
- ModMyPi
- Raspberrypi.org The Official site
- Raspberry Connect
- FlightAware PiAware setup instructions
- NooElec Store for alternative SDRs
- SparkFun
Please be sure to bookmark them as well as bookmark W6AER.COM if you find it useful!


